Choosing the hour of a shoot
The same facade at dawn, at noon and at night: the scheduling question gets settled by looking at three images side by side, before booking a crew for a slot.
A Text node describes the place, Nano Banana Pro photographs it at dawn, a second node rephotographs exactly the same spot at night. Workflow visible here, no account needed.
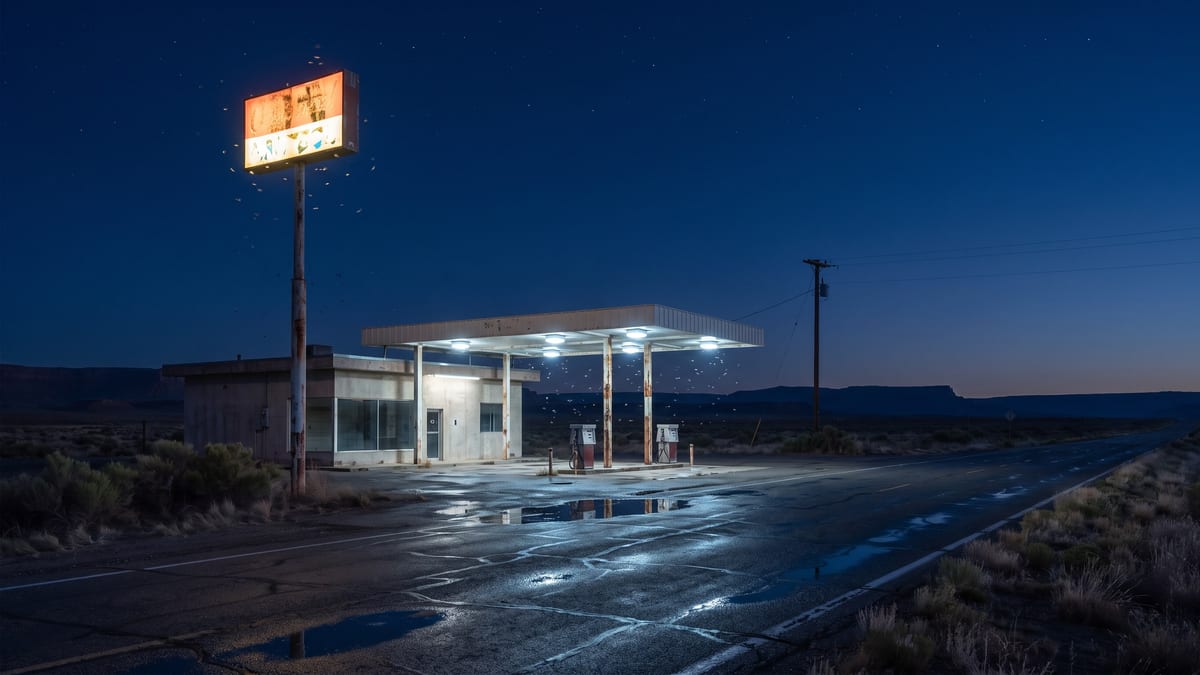
Real workflow: an invented petrol station on a desert highway, photographed at blue hour then at night in the rain. Both images come from the demo, the second starts from the first.
At a glance
Before shooting, a director wants to see it: what this place looks like at dawn, and what it looks like at night. That question decides the schedule, and it comes up long before a real location is available. This workflow answers it in two images.
The hard part is not making a beautiful image, it is making the SAME ONE TWICE. Two independent generations give two different petrol stations, and there is nothing left to compare. The second image therefore starts from the first, and the prompt forbids touching the architecture, the layout and the angle of view.
It is the same move as scene coverage, applied to the place instead of the actor. Two images cost thirty-eight credits, and a scout that costs less than a tank of petrol can be redone as often as you like.
These are the files of the workflow above, exactly as the models produced them, unretouched. The starting point is shown when there is one.
Render
Directors, cinematographers and producers who have to choose a location and an hour before setting foot on site.
Nothing, or your own scouting photo in a Media node if the place already exists: the rest is identical.
Describe the place, not the mood
The architecture, the materials, what surrounds it, the lens and where you stand. The hour and the weather come later: they are what will change from one image to the next.
Photograph the first hour
Dawn, noon, blue hour: whichever seems most likely. That image becomes the truth that every later one has to match.
Wire the image into the second node
The image port of the second node receives the first render. Without that cable you are not scouting, you are making two images that vaguely resemble each other.
Forbid any change to the place
Same angle, same lens, same building, same objects. The prompt should let only the hour, the light and the weather move.
The same canvas, tuned for different needs: each variation is two or three lines of prompt away.
The same facade at dawn, at noon and at night: the scheduling question gets settled by looking at three images side by side, before booking a crew for a slot.
A place that does not exist yet is easier to defend with two images than with three paragraphs, and nobody mistakes a scouting board for a promise to shoot.
Showing the light you want instead of describing it: the image says the direction, the temperature and where the sources sit better than a phone call ever will.
A lost station, a derelict factory, a lighthouse: locations you cannot visit get drawn first, and the question of shooting them comes afterwards, with eyes open.
On a short format the location is half the film. Two hours of the day compared beat a long debate, and the cinematic ad then takes the chosen place onwards.
What changes can be the season instead: snow, dry grass, heavy rain. The principle does not move, only the prompt of the second image does.
This is the mistake that empties the scout of its purpose. Without the cable between the nodes the model redraws another building, and you compare two places instead of two hours.
If dawn is already in the description of the place, the model mixes set and light, and the second image changes both. The place first, the hour second.
A scout is read at the same framing. A different angle gives two nice images that do not compare, and the cinematographer gets nothing out of them.
An image model likes to fill: a car, a passer-by, a dog. On a scout they hide exactly what you came to look at.
Yes, and it is the best use: drop your scouting photo into a Media node, wire it to the first Image node, and ask for the same view at another hour. The place is real, the hour is invented.
As many as you have Image nodes, all wired to the first photo. Dawn, harsh noon, golden hour, night: four images for a little over seventy credits, and a comparison that finally holds.
No. It replaces the reference board you show a producer or a cinematographer before travelling, and it helps you choose the hour of the shoot. The place itself still has to be visited.
Thirty-eight credits for the two images in the demo, nineteen per image on Nano Banana Pro. One more hour of the day costs nineteen credits.
Because it holds a whole scene when asked to rephotograph it: that is the capability measured on the dark business card on 18 September 2026, and it is exactly what is needed here.
They come out in 2K, which is plenty for a board, a presentation or a working document. For a larger display, the Upscale node enlarges without another generation.
Yes, and you should: the focal length and the eye level are in the demo prompt. That is what makes the board useful to a cinematographer rather than merely pretty.
No, they are invented, and at this stage that is the point. If you want a real place, start from your own photo: the workflow is the same, only the input changes.
Scout film locations with AI
Use this workflowFree account, no card required. The workflow opens pre-filled in your canvas.
 Nano Banana Pro
 GPT Image 2.5 Flare
 Seedream 5 Pro